
Understanding the Causes of Leaky Faucets
Leaky bathroom faucets are a common household issue that can lead to both inconveniences and increased water bills. Understanding the underlying causes is essential for effective troubleshooting and repair. One of the most frequent culprits is worn-out washers. These small rubber or plastic components create a seal when the faucet is closed. Over time, continual use may cause these washers to deteriorate, resulting in a drip that can be both annoying and wasteful.
Another significant cause of leaks is damaged O-rings. O-rings are circular gaskets located in the handle of compression faucets. They play a vital role in preventing water from escaping when the faucet is not in use. If an O-ring becomes brittle or breaks, it can lead to a leak at the point where the handle meets the faucet body.
Corroded valve seats can also contribute to leaky faucets. The valve seat, where the faucet washer presses against, can corrode due to continuous exposure to water and minerals present in it. This corrosion can create gaps that allow water to escape, leading to leaks. Regular cleaning and maintenance can sometimes prevent this problem from escalating.
Lastly, problems with cartridge faucets can lead to leakage. Cartridge faucets work differently than traditional compression faucets. They consist of a cartridge that controls the flow of water. If a cartridge is worn out or misaligned, it can fail to create a proper seal, resulting in leaks. Consequently, understanding how different types of faucets operate is crucial in diagnosing the cause of leaks accurately and addressing them accordingly.
Regular Maintenance and Inspection
Maintaining your bathroom faucet is essential to prevent leaks and ensure a long-lasting fixture. A routine inspection of your faucet can help identify early signs of wear or malfunction, allowing you to address potential issues before they escalate into significant problems.
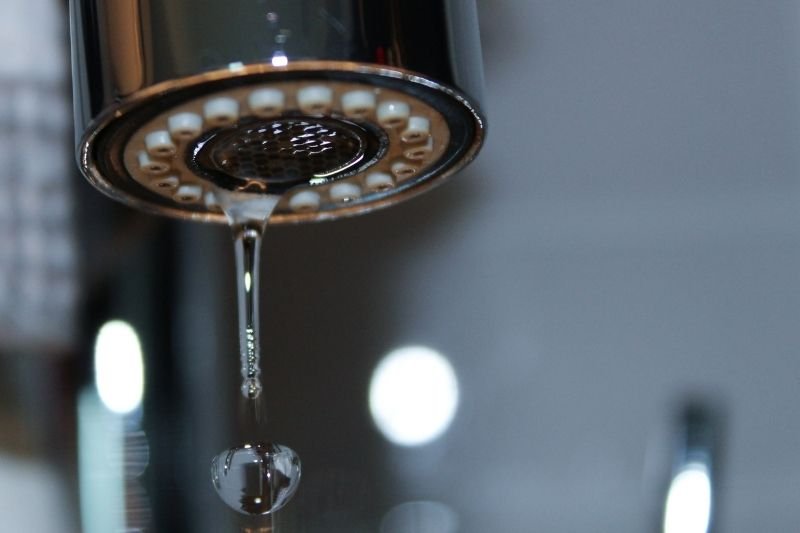
Start by checking the faucet handle for any irregular movement or difficulties in operation, as these can indicate worn internal components. Additionally, observe the area around the faucet and underneath the sink for any moisture or water spots, which may suggest leaks. Paying attention to the faucet’s spout is also important; any dripping or constant water flow could be an early sign of wear that requires immediate attention.
For effective maintenance, set up a schedule to inspect your faucets at least twice a year. During this maintenance check, you should also clean the faucet to remove any mineral deposits or grime that could lead to clogging and reduced performance. Use a mild cleaner and a soft cloth to avoid scratching the surface, thereby maintaining the faucet’s aesthetic appeal.
If you notice worn washers, O-rings, or any other components, it is advisable to replace them promptly. These small parts can wear out over time and may lead to leaks if not addressed. Always consult your faucet’s manual or manufacturer’s guidelines for specific parts that may need regular replacement. By proactively caring for your faucet and conducting timely inspections, you can significantly reduce the likelihood of a leaky faucet, preserving both functionality and style in your bathroom.
Choosing Quality Fixtures and Components
When it comes to preventing a leaky bathroom faucet, selecting high-quality fixtures and components is of paramount importance. Investing in quality products not only enhances functionality but also ensures durability and longevity. Lower-grade fixtures may seem appealing due to their lower price points, but they are often poorly constructed, leading to frequent leaks and the need for replacements. Consequently, this can result in higher long-term costs associated with repairs and water usage.
One of the key factors in preventing leaks is the type of material used in manufacturing faucets and components. Faucets made from solid brass tend to offer superior durability compared to plastic alternatives. Brass is resistant to corrosion, ensuring that the faucet mechanisms remain functional over time. Additionally, ceramic disc valves, which are commonly found in high-quality faucets, provide a better sealing mechanism, significantly reducing the risk of leaks.
Consumers are often faced with a variety of brands when selecting bathroom fixtures. Reputable brands such as Moen, Delta, and Kohler are known for their reliable products and excellent customer service. These manufacturers often offer warranties that can provide peace of mind, indicating a commitment to quality. In contrast, lesser-known brands may cut manufacturing costs and compromise on material quality, leading to potential performance issues.
While there are various styles to choose from—such as single-handle, double-handle, and pull-down faucets—each type comes with its own pros and cons. Single-handle faucets generally provide easy temperature control and require less space, while double-handles can offer a more traditional look and additional control over water flow. Assessing the specific needs for your bathroom, along with considering the quality of the brand and materials, will ultimately contribute to a more reliable faucet that minimizes the chance of leaks.
DIY Repair Tips for Minor Leak Issues
When it comes to addressing a leaky bathroom faucet, there are several effective DIY repair tips to consider. These repairs can often be completed with minimal tools and a bit of patience. The first step is to gather the necessary tools, which typically include an adjustable wrench, a screwdriver (Phillips or flathead, depending on your faucet), plumber’s tape, and replacement washers or O-rings, which can be purchased at most hardware stores.
Begin by turning off the water supply to the faucet. This is usually located under the sink. Next, open the faucet to release any remaining water, which will prevent spills during the repair process. Once the water is off, remove any decorative caps on the faucet handle to access the screws. Carefully unscrew the handle, and gently pull it off to reveal the inner components.
Examine the valve and O-rings for signs of wear, which are common culprits of leaks. If the O-rings appear cracked or damaged, carefully remove them and replace them with new ones. Additionally, if the washer at the base of the faucet is worn out, replacing it can effectively resolve leaks. When replacing washers and O-rings, ensure you select the correct size to prevent further issues.
Once you have made the necessary replacements, reassemble the faucet by reversing the disassembly process. Make sure to tighten all screws firmly, but avoid over-tightening, which can cause more damage. After reassembly, turn the water supply back on and check for leaks. If leaks persist after these repairs, it may be time to call a professional plumber, as more complex issues may require advanced expertise.
By following these DIY tips, you can confidently tackle minor leak issues, potentially saving on plumbing costs and gaining valuable repair skills.
